


"The Lost Files of G'Kane"
Tips'n'Tricks
LightWave 3D

Photoshop

Illustration
[Introduction]
Here you can find a number of tips and tricks concerning mostly LightWave 3D modeling and rendering. Most of them are aimed at the new to intermediate user, advanced users might find them usefull as well though.
I have been collecting answers to all the questions I have recieved over and over, general tips that have come into my mind and all that kind of stuff. Much of this some of you might already know or may have heard elsewhere, I am just trying to help people out who have not been so lucky.
I will keep adding new tips and tricks here on a "hey, I just thought of that" basis, so this page should be updated frequently, but not on a regular basis. Keep checking back!
[LightWave 3D Tips]
Starfields
Look up at the sky at night, its loaded with stars! So forget randomstars.lwo? No way, it's actually all you'll need for the beginning. Here are some tips to make a great starfield withough even entering Modeler.- never use medium/automatic particle size for your starfield! This is an error I am seeing over and over again, stars don't appear that large - turn down the particle size in the objects panel to small (aprox. 1 pixel when rendered) - only if you want a certain pattern of stars to appear larger (like fixstars) you should use medium particle size
- it helps having a GREAT number of stars as well, for many of my images I used as many as 5 randomstars objects, rotated and scaled differently - this will make for a nice dense starfield
- even without applying different surface names to elements of randomstars.lwo you can make it look a lot better. Throw in some fractal noise luminosity and several layers of soft blue, red and yellow colored fractal noise as color textures. You don't need to use transparency to get differently bright stars, the luminosity works just as well
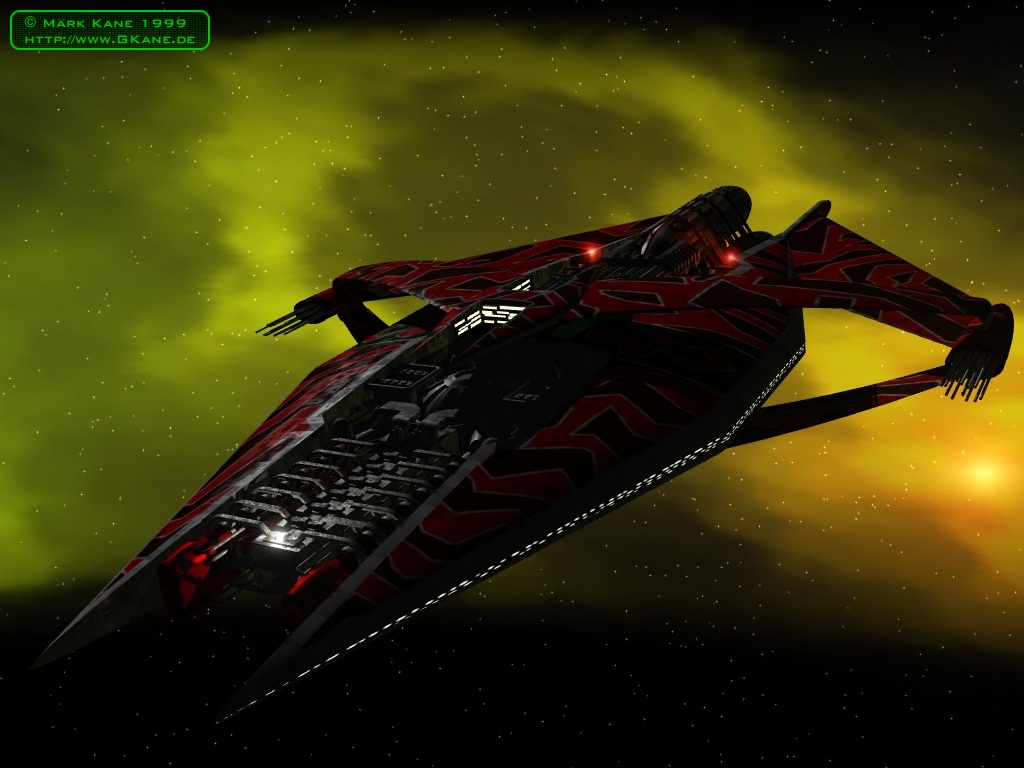
- a thrown in backdrop nebulae is something you will see very often, but rarely in a high quality - spend some time retouching the nebulae (the NASA footage usually has the look of low quality photographs if you don't) - or even better, paint your own, like I did for the nebulae on this page - and map it onto a curved background polygon placed behind the randomstars objects instead of using it as backdrop only!
- important - to prevent rendering artifacts (e.g. grey stars in front of a bright white nebulae spot) when using a bright nebulae and starfields, turn additive on in the surfaces panel for the starfield (if in front of the nebulae - otherwise you can turn it on for the nebulae to let the stars shine through from behind)
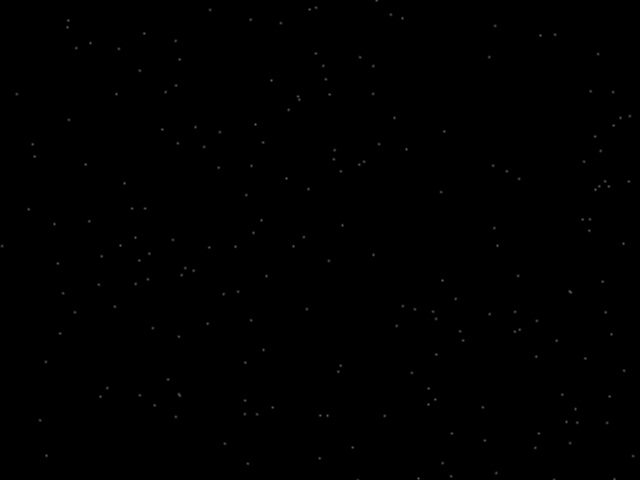 Before |
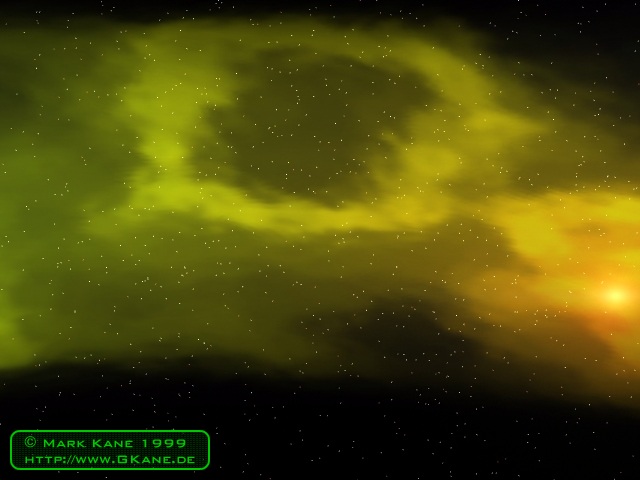 After |
You should be able to make some pretty decent starfields now - I hope you found these tips usefull!
Lighting in space
- it has been said often, but it seems not often enough - turn off ambient light, or at least turn it down to something like 5%
- don't worry about loosing the contours of your ship before the black of space - a nice side-effect of the background nebulaes is that you can make out the shape of the vessels before them even on their unlit sides! Cool eh?
- if you want the features of your spaceship to be more visible, throw in a soft (about 20% with no shadows) light in the color of your background nebulae or planet
- if that's not enough add a seperate "fill light" to light the scene from a distance - usually a 25% spotlight with no shadows works good, a directional light tends to look a lot like ambient light, a spot is more real because the light hits the surfaces at different angles
- for flares simulating lamps on the hull of large spaceships its best to use a point light with high intensity (200% to 500% depending on the surface that is to be lit and what you want) and a sharp falloff value (this makes the ship appear a lot larger)
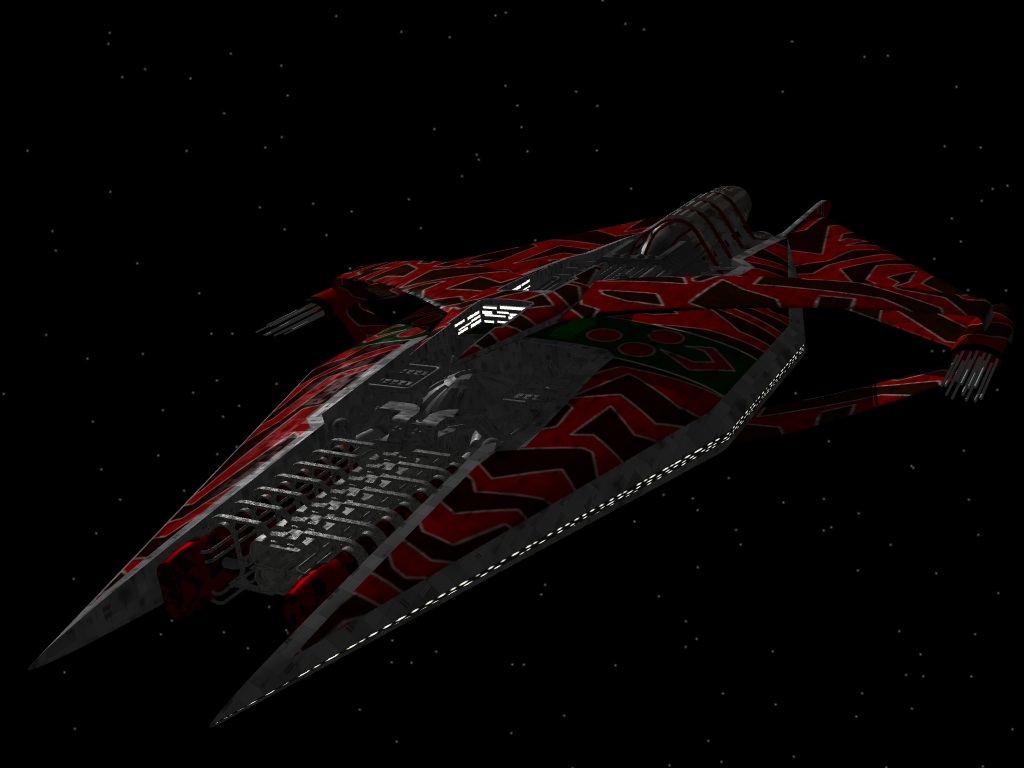 Before |
 After |
There's a lot more to tell about lighting in space scenes, so maybe I will write a more complex tutorial on this sometime.